Pytorch Training Job with datasets
This example shows how to use Arena to submit a distributed pytorch job and mount an NFS data volume. The sample downloads the source code from git URL.
1. Set up an NFS server.(refer to: https://www.cnblogs.com/weifeng1463/p/10037803.html )
step1: install the nfs-utils.
➜ yum install nfs-utils -y
step2: Create local directory of NFS server.
➜ mkdir -p /root/nfs/data
step3: Configure nfs server
➜ cat /etc/exports
/root/nfs/data *(rw,no_root_squash)
step4: Start nfs server
➜ systemctl start nfs;  systemctl start rpcbind
➜ systemctl enable nfs
Created symlink from /etc/systemd/system/multi-user.target.wants/nfs-server.service to /usr/lib/systemd/system/nfs-server.service.
2. Download training data to shared directory of NFS.
step1: Get information of NFS server by showmount, 172.16.0.200 is the host ip of NFS server
➜ showmount -e 172.16.0.200
Export list for 172.16.0.200:
/root/nfs/data *
step2: Enter shared directory.
➜ cd /root/nfs/data
step3: Prepare training data to shared directory.
➜ pwd
/root/nfs/data
step4: list files, MNIST -> That's the training data we need.
➜ ll
total 8.0K
drwxr-xr-x 4  502 games 4.0K 6月  17 16:05 data
drwxr-xr-x 4 root root  4.0K 6月  23 15:17 MNIST
3. Create a PV.
# Note: Typesetting may cause yaml indentation problems
➜ cat nfs-pv.yaml
apiVersion: v1
kind: PersistentVolume
metadata:
  name: pytorchdata
  labels:
    pytorchdata: nas-mnist
spec:
  persistentVolumeReclaimPolicy: Retain
  capacity:
    storage: 10Gi
  accessModes:
  - ReadWriteMany
  nfs:
    server: 172.16.0.200
    path: "/root/nfs/data"
create the pv by kubectl.
➜ kubectl create -f nfs-pv.yaml
persistentvolume/pytorchdata created
check the pv create by us.
➜ kubectl get pv | grep pytorchdata
pytorchdata   10Gi       RWX            Retain           Bound    default/pytorchdata    7m38s
4. Create a PVC base on the pv created by us.
create the pvc manifest.
➜ cat nfs-pvc.yaml
apiVersion: v1
kind: PersistentVolumeClaim
metadata:
  name: pytorchdata
  annotations:
    description: "this is the mnist demo"
    owner: Tom
spec:
  accessModes:
    - ReadWriteMany
  resources:
    requests:
       storage: 5Gi
  selector:
    matchLabels:
      pytorchdata: nas-mnist
create the pvc by kubectl.
➜ kubectl create -f nfs-pvc.yaml
persistentvolumeclaim/pytorchdata created
check the pvc.
➜ kubectl get pvc | grep pytorchdata
pytorchdata   Bound    pytorchdata   10Gi       RWX                           2m3s
5. Check the data volume.
➜ arena data list
NAME         ACCESSMODE     DESCRIPTION             OWNER  AGE
pytorchdata  ReadWriteMany  this is the mnist demo  Tom    2m
6. Submit the pytorch job through --data pvc_name:container_path mount distributed storage volume.
➜ arena --loglevel info submit pytorch \
    --name=pytorch-data \
    --gpus=1 \
    --workers=2 \
    --image=registry.cn-beijing.aliyuncs.com/ai-samples/pytorch-with-tensorboard:1.5.1-cuda10.1-cudnn7-runtime \
    --sync-mode=git \
    --sync-source=https://code.aliyun.com/370272561/mnist-pytorch.git \
    --data=pytorchdata:/mnist_data \
    "python /root/code/mnist-pytorch/mnist.py --backend gloo --data /mnist_data/data"

configmap/pytorch-data-pytorchjob created
configmap/pytorch-data-pytorchjob labeled
pytorchjob.kubeflow.org/pytorch-data created
INFO[0000] The Job pytorch-data has been submitted successfully
INFO[0000] You can run `arena get pytorch-data --type pytorchjob` to check the job status
7. Get status of volume pytorchdata in one of the instances by kubectl describe.
# Get the details of the this job
➜ arena get pytorch-data
STATUS: SUCCEEDED
NAMESPACE: default
PRIORITY: N/A
TRAINING DURATION: 56s

NAME          STATUS     TRAINER     AGE  INSTANCE               NODE
pytorch-data  SUCCEEDED  PYTORCHJOB  1m   pytorch-data-master-0  172.16.0.210
pytorch-data  SUCCEEDED  PYTORCHJOB  1m   pytorch-data-worker-0  172.16.0.210
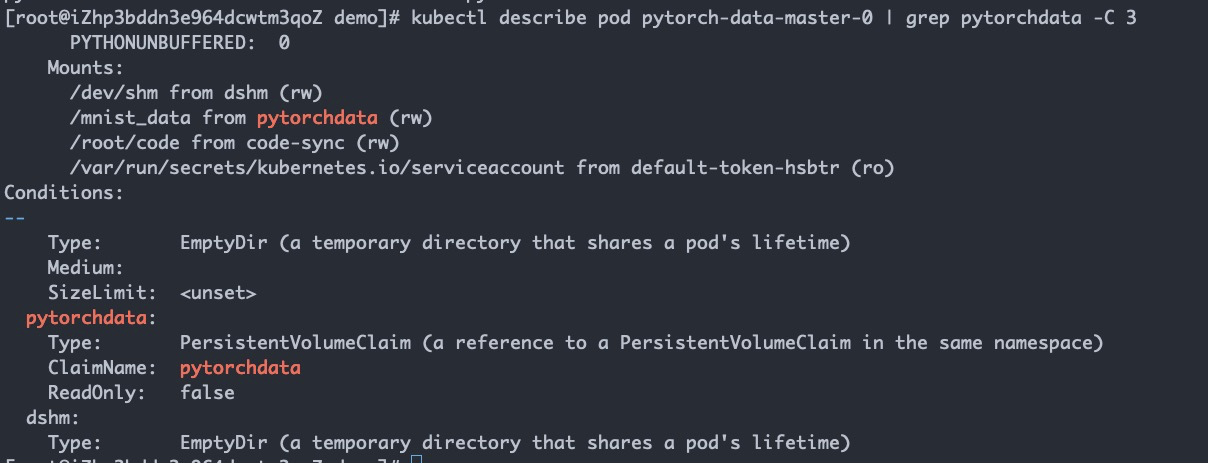
8. Get status of volume pytorchdata from pytorch-data-master-0.
➜ kubectl describe pod pytorch-data-master-0 | grep pytorchdata -C 3